Purpose
Prerequisites
An existing layout
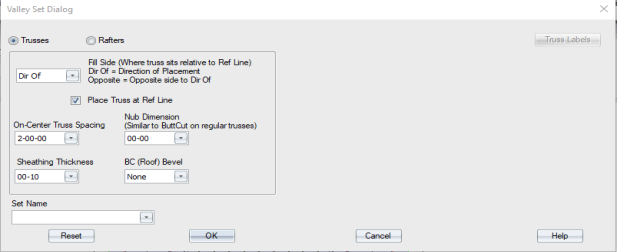
Steps
- From the Truss Placement menu, select Valley Set or click

The Valley Set Dialog displays.
- Click Rafters.
Rafter options display on the right side of the dialog.
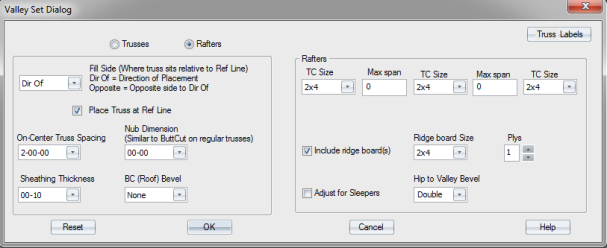
3. Complete the Rafters options on the Valley Set Dialog and click OK.
The following prompt displays:

4. For the top chord, select the lines to create the polygon area where the valley rafter will be created.
The selected lines are displayed with a dashed red line.
5. Right-click to accept your selections.
The following prompt displays:

6. For the bottom chord, select the plane that the rafters will bear on.
7. Right-click to accept your selections.
The following prompt displays:

8. Select a line to create a reference line. The steps to create the reference line will vary depending on which reference line option is selected.
The Enter Offset dialog displays.
9. Enter an offset and click OK, or just click OK.
The following prompt displays:

10. Click a line to indicate direction.
The following prompt displays:

11. When you click a stop point or drag a rubber band line, the rafters are created.
 Notes: Sleepers are not included on the layout. The Adjust for Sleepers check box allows you to set rafter height. Sleepers must be added manually in Director.
Only sloped rafters are created using this feature. In areas where a hip front plane is located in the valley polygon area, only the sloped rafters at the side planes are created. Rafters are not created under the front plane.
If the Include Ridge Boards option is not selected, all rafters are held back as if there is a ridge board; this also occurs at hip ridge lines.